Dr.Web protects your privacy by controlling application access to microphones connected to your computer.
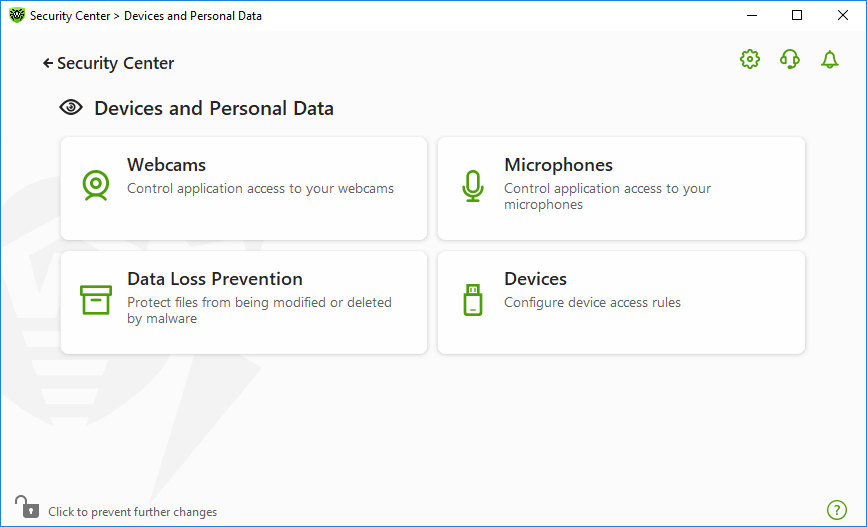
To access the Microphones window
1.Open Dr.Web menu ![]() , then select Security Center.
, then select Security Center.
2.In the open window, click Devices and Personal Data tile.
3.Make sure Dr.Web operates in administrator mode (the lock at the bottom of the program window is open ![]() ). Otherwise, click the lock
). Otherwise, click the lock ![]() .
.
4.Click the Microphones tile. A parameter window opens.

Figure 81. Access to the Microphones window
In this section:
•Dr.Web reaction to application access to microphones
•Access for specific applications
Dr.Web reaction to application access to microphones
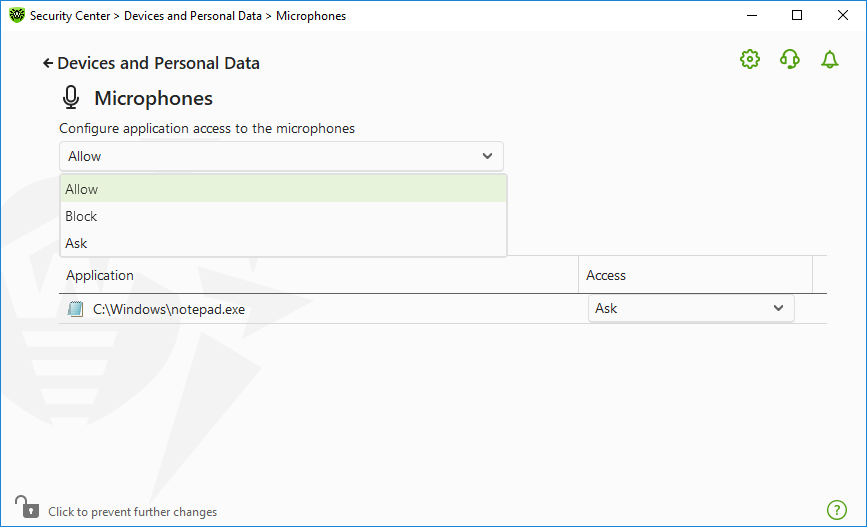
In the drop-down window, select an operation mode to be applied to all applications.
•Allow—applications are allowed to access microphones. This option is selected by default.
•Block—applications cannot access microphones.
•Ask—on every application attempt to access a microphone, you are prompted to select a further action for the application: allow or block access to the microphone.

Figure 82. Selecting an access mode for an applications
Access for specific applications
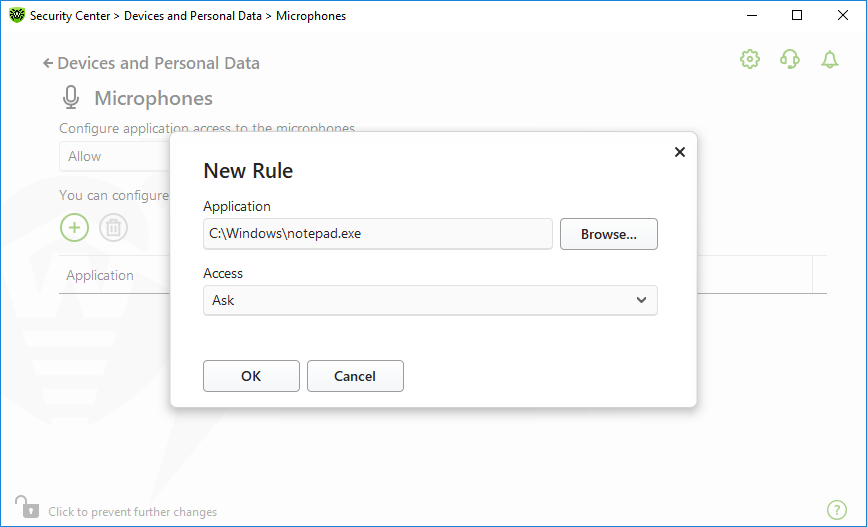
To configure access rules for specific applications
1.Click .
2.In the open window, click the Browse button and select an application that you want to create a rule for.
3.Select the microphone access mode in the drop-down list.

Figure 83. Creating an access rule for an application
Application list
You can edit access rules for applications.
•To edit an application rule for a certain application, select a new value in the drop-down menu for this application.
•To delete a rule, select an application from the list and click . Click OK to confirm the deletion.
Receiving notifications
When access to microphones is blocked for a process, a notification is displayed. If necessary, you can configure desktop and email notifications.
See also: