To protect content of important folders from being changed by malicious software, use the Data Loss Prevention feature. With this feature enabled, you can view and add files to a protected folder, however, any modification or removal of files from this folder is blocked. To allow access to a folder for applications, add necessary applications to exclusions. You can also restore previously saved copies.
To open the Data Loss Prevention window
1.Open Dr.Web menu ![]() , then select Security Center.
, then select Security Center.
2.In the open window, click Devices and Personal Data tile.
3.Make sure Dr.Web operates in administrator mode (the lock at the bottom of the program window is open ![]() ). Otherwise, click the lock
). Otherwise, click the lock ![]() .
.
4.Click the Data Loss Prevention tile.
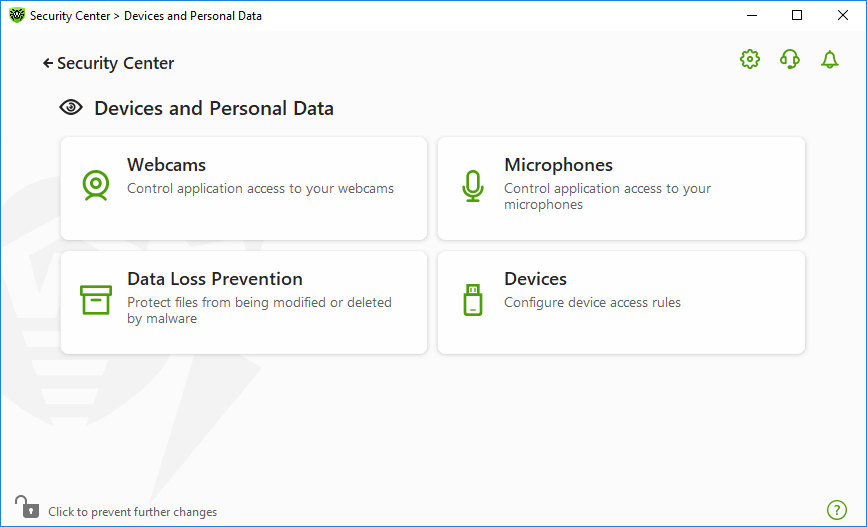
Figure 83. Access to the Data Loss Prevention window
In this section:
•Dr.Web operation with previously saved file copies
•Restore and delete saved copies
![]() Dr.Web operation with previously saved file copies
Dr.Web operation with previously saved file copies
Beginning from the version 12.0, you do not have an option to save file copies. As an alternative to the feature of saving copies, a new feature of protected folders is used from now on. As the operation principle has been changed, you should configure protection of folders again. Folders that were protected in previous versions of program are added to the list of protected folders, regardless of whether copies of these folders have been saved or not. At the first program launch after updating to version 12.0, a notification appears informing you about switching the file backup feature to the protected folders feature: 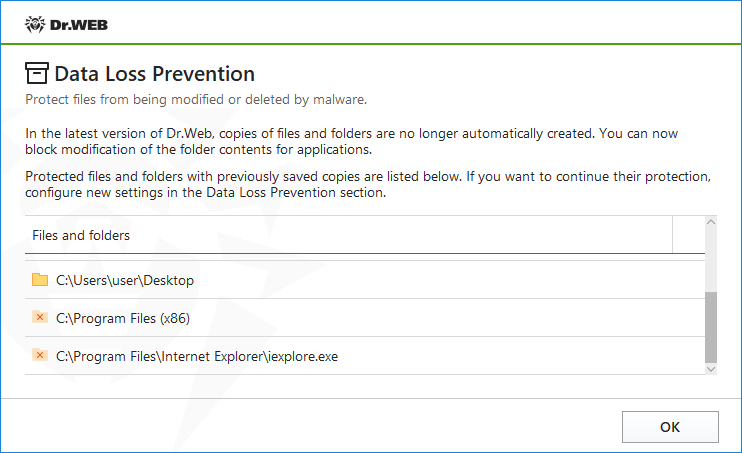 Figure 84. Notification on changing the component operation principle In this notification, you can also see the list of all detected folders and files for which the protection has been enabled. If the folder cannot be added to the list of protected ones, it is marked with By default, the protection of the folders, that were transferred from previous product versions, is disabled. To protect such folders, go to the Data Loss Prevention window and check necessary folders in the Enable protection column. You can also restore file copies saved in previous versions. Notifications After the program upgrade to the version 12.0, you are notified about the changes in Data Loss Prevention operation principals: •Right after the computer restart, in the center of the screen, the notification on changing the component operation principle is shown. See the figure 84. •In Notification Feed, the notification on changes in the method of folder protection. To access the new settings of folder protection, click Configure protection button. The notification is deleted after that. 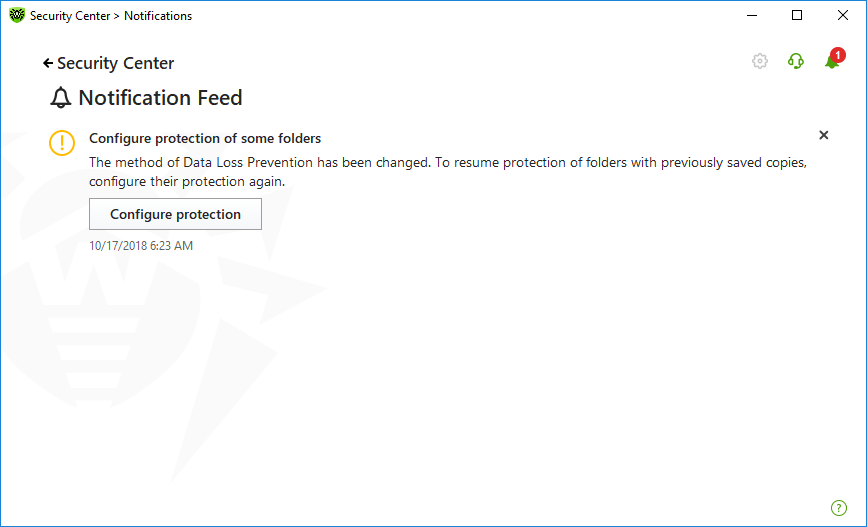 Figure 85. Notification in the feed •When you open the Data Loss Prevention window for the first time after the program upgrade, a notification with the list of files and folders that cannot be protected is displayed. 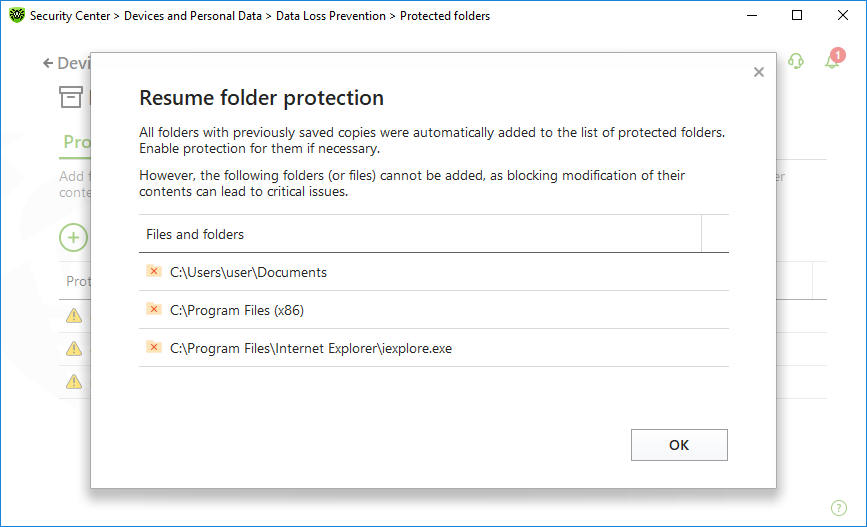 Figure 86. Notification on the first visit of the Data Loss Prevention window |
For each folder, you can configure application access parameters. You can view and copy the protected folder. You can also create new elements in this folder. The processes that create the new elements can modify them until these processes are completed. When an application attempts to access the folder, a notification on access blocking will be displayed.
|
If a threat is detected in files in protected folders, only Dr.Web can still remove and modify them. |
If you add a folder to the list of protected folders, a default rule is applied to it. Thus, any modification and removal of the folder content is restricted for all applications, except those from the list of trusted applications. To view this list, visit the website https://products.drweb.com/services/data_protection/. The list contains the most popular applications, for example, some Microsoft and Adobe applications. System processes, such as explorer.exe, are not included into the list of trusted applications as they can be used by malicious objects to attack the system.
|
It is restricted to add system folders to the list of protected ones. This may lead to critical system operation errors.
Data Loss Prevention applies only to local files and folders (physically located on your device) within the same operating system on which the protection is configured. If you have several operating systems on the same computer, you should configure Data Loss Prevention separately on each system. Protection of network files and folders is not possible. |
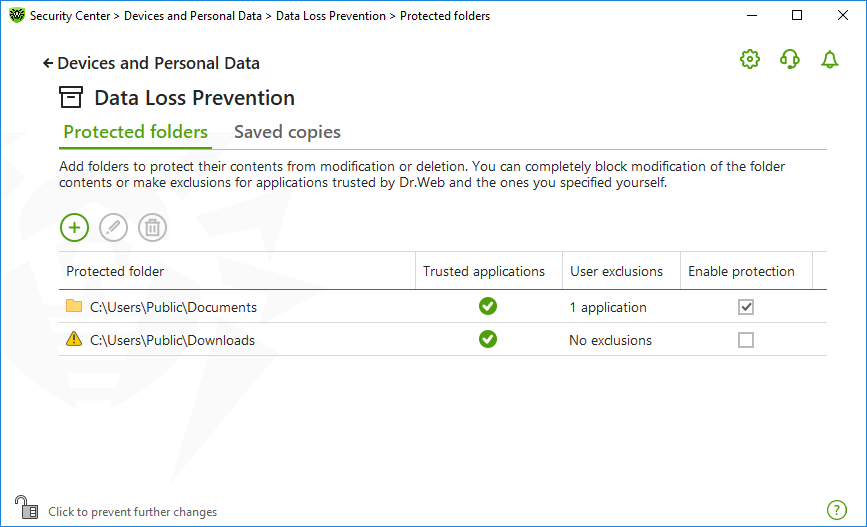
Figure 87. Protected folders
In the table, you can see information on:
•protected object,
•number of exclusions from a general rule, and
•protection status.
To activate protection, select the Enable protection check box for the necessary object. If this check box is cleared, the folder is not protected any more. It is displayed with the ![]() icon.
icon.
The following management elements are available to work with objects in the table:
•The ![]() button—adding an object to the list of protected objects.
button—adding an object to the list of protected objects.
•The ![]() button—editing elements in the table.
button—editing elements in the table.
•The ![]() button—removing an object from the list of protected objects.
button—removing an object from the list of protected objects.
To add a folder to the list of protected folders
1.Click the ![]() button. In the open window, select the necessary object by clicking the Browse button.
button. In the open window, select the necessary object by clicking the Browse button.
2.If necessary, enable or disable access to the folder for trusted applications. This option is enabled by default.
3.You can also specify applications that will have full access to an object regardless of the general settings.
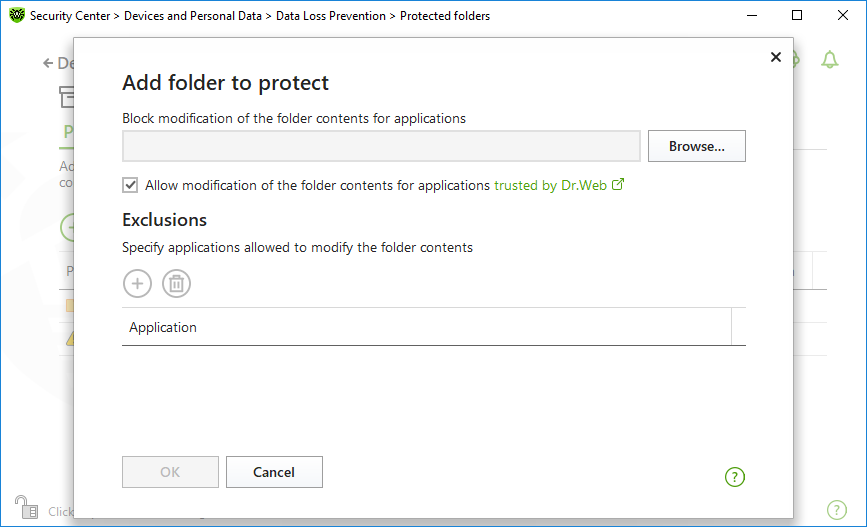
Figure 88. Adding a protected folder
The number of applications that have full access to the protected folder is displayed on the main window of Data Loss Prevention in the User exclusions column.
To add an application to the exclusions
1.In the Data Loss Prevention window, click ![]() to add a new folder to the list of protected.
to add a new folder to the list of protected.
2.In the open window, click ![]() . Select an application that will have full access to the objects in the protected folder.
. Select an application that will have full access to the objects in the protected folder.
3.Click OK.
To edit the list of exclusions for protected folders
1.Select a folder from the list and click ![]() .
.
2.At the bottom of the open window in the table, you can see all applications that have full access to the selected folder.
•To add a new application, click ![]() .
.
•To delete an application from the list of exclusions, click ![]() .
.
3.Click OK.
The tab is available only if you have copies of files saved in the previous versions of the program. This function allows you to restore and remove saved copies. However, you cannot save new copies.
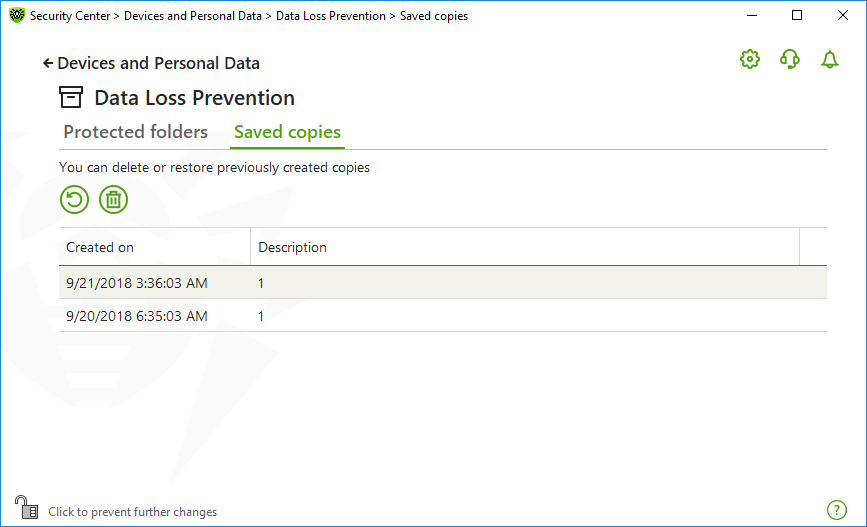
Figure 89. List of saved copies
Removal of created copies
You may also delete existing copies to free up some disk space (deleting the copies will not affect the original files). To do that, select the necessary copy and click the ![]() button.
button.
If any threat has caused corruption of your files, you can restore copies of these files created on a specific date. To do that:
1.Select the necessary copy (the date when the copy was created is displayed in the left column) and click the ![]() button.
button.
2.In the open window, specify the path to the folder to which the files will be restored.