You can configure parameters of receiving notifications on critical and important events of Dr.Web operation.
In this section:
•Configuring notification parameters
•Configuring showing notifications on the desktop
•Configuring email notifications
If necessary, configure parameters of receiving notifications on critical and important events of Dr.Web operation.
To open the notification settings
1.Open Dr.Web menu ![]() , then select Security Center.
, then select Security Center.
2.Make sure Dr.Web operates in administrator mode (the lock at the bottom of the program window is open ![]() ). Otherwise, click the lock
). Otherwise, click the lock ![]() .
.
3.At the top of the program window, click .
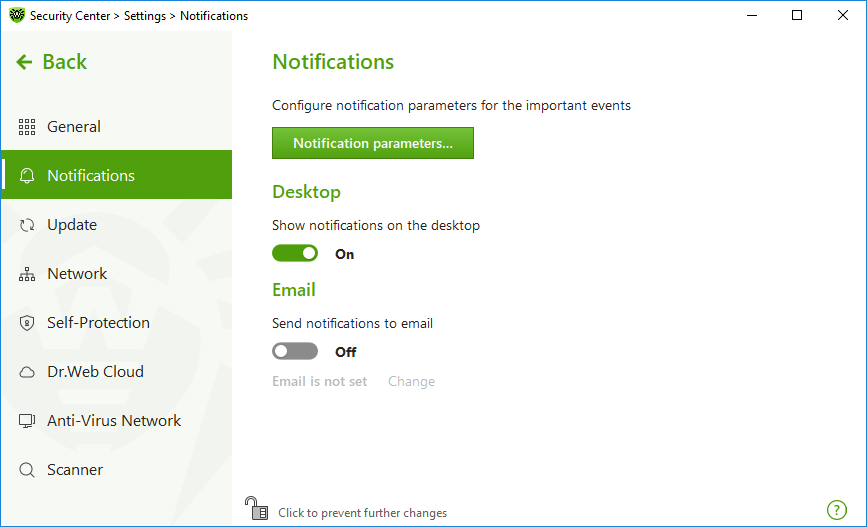
4.A product main settings window opens. Select Notifications at the left of the window.

Figure 28. Notification settings
To configure notification parameters
1.Click Notification parameters.
2.Select notifications that you want to receive.
•To display the notifications on the desktop, select a corresponding option in the Desktop column.
•To receive email notifications, select check boxes in the Email column.
Clear check boxes if you do not want to receive notifications on the event.
Notification type |
Description |
|---|---|
Threat is detected |
Notifications on threats detected by SpIDer Guard and SpIDer Gate. By default, these notifications are enabled. |
Critical notifications |
Notifications on the following critical issues: •Connections waiting for Firewall to reply are detected. By default, these notifications are enabled. |
Major notifications |
Important notifications on the following issues: •Working time on computer has expired. •Virus databases are out of date. •Access to webcam or microphone is blocked. •Device is blocked. •Attempt to change system date and time is blocked. •Access to the protected object is blocked by Behavior Analysis. •Access to the protected object is blocked by Exploit Prevention. •Access to the protected object is blocked by Ransomware Protection. •Information about product updates and support |
Minor notifications |
Minor notifications on the following issues: •URL is blocked by Parental Control. •URL is blocked by SpIDer Gate. •Working time in the internet has expired. •Access to the protected object is blocked by Parental Control. •Successful update. •Update error. •Modification of the folder contents is blocked for the process. By default, these notifications are disabled except the notification on blocking an attempt of a process to modify folder contents. |
License |
Notifications on the following issues: •License expires. •The valid license is not found. •The current license is blocked. |
3.If necessary, configure additional parameters:
Option |
Description |
|---|---|
Do not show notifications in full-screen mode |
Hide notifications when an application is running in full-screen mode on your computer (e.g., a game or a movie). Clear this check box to display notifications regardless of the mode. |
Display Firewall notifications on separate desktop in full-screen mode |
Notifications from Firewall on a separate desktop when an application is running in full-screen mode on your computer (a game or a movie). Clear this check box to display notifications on the same desktop where an application is running in full-screen mode. |
4.If you select one or more email notifications, configure sending emails from your computer.
|
Notifications on the following issues are not included in any of the specified groups and are always displayed to the user: •Priority updates installed and restart is required. •To finish neutralizing threats, restart the computer. •Automatic restart. •Request for allowing a process to modify an object. •Successful connection to a remote computer in the Anti-virus Network. •You activated a trial version. It is recommended that you obtain a license. •New keyboard connected. |
In the notification settings window, enable the appropriate option to get pop-up notifications above Dr.Web icon ![]() in the Windows notification area.
in the Windows notification area.
Email notifications
To receive email notifications about events
1.In the notification settings window, enable the Send notifications to email option.
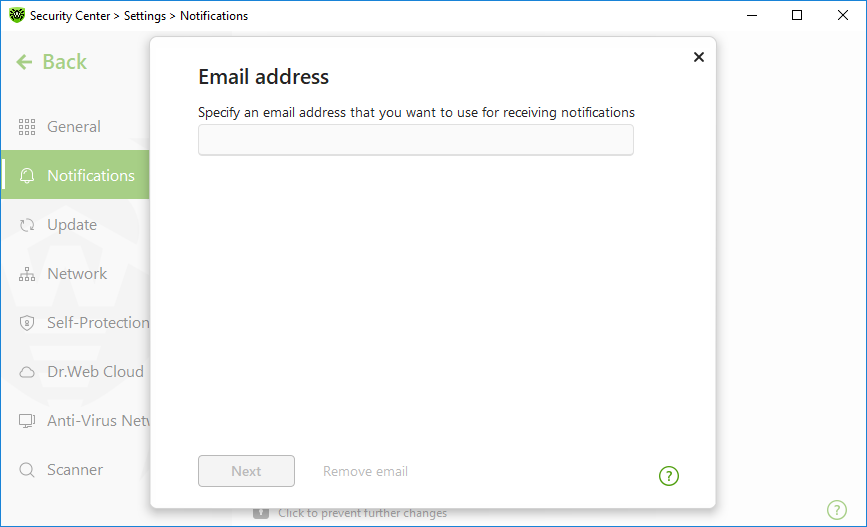
2.Specify the email address that you want to use for receiving notifications in the appeared window. You will need to confirm this email address at step 7.

Figure 29. Specifying address for email notifications
3.Click Next.
4.In the open window, specify the data of the account that will be used to send notifications.
•Select the mail server from the list and enter your account login and password.
•If the required mail server is not on the list, select Set manually. In the open window, fill in the following fields:
Option |
Description |
|---|---|
SMTP server |
Specify the outgoing (SMTP) server for Dr.Web to use when sending email notifications. |
Port |
Enter the port for Dr.Web to use when connecting to the mail server. |
Login |
Enter the login for Dr.Web to use when connecting to the mail server. |
Password |
Enter the password for the login to be used when connecting to the mail server. |
Use SSL/TLS |
Select this check box to use SSL/TLS encryption when sending messages. |
NTLM authentication |
Select this check box to use NTLM authentication when connecting to the mail server. |
5.Click Send a test message link to make sure that all the details are specified correctly. The message is forwarded to the email address that will be used to send notifications (specified at step 4).
6.Click Next.
7.Enter the conformation code that was sent to the email address specified at step 2. If you do not receive the message within 10 minutes, click Send the code again. If you do not enter the code, notifications to this email address will not be sent.
To change the email address and other parameters, in the notification settings window (see Figure Notification settings), click Edit and repeat all the actions starting from step 2.