You can configure the parameters of connection to the proxy server, enable scanning data transmitted over cryptographic protocols, and export Doctor Web certificate to be further imported into other programs.
In this section:
•Proxy server connection settings
•Scanning data transmitted over cryptographic protocols
To open network settings:
1.Open Dr.Web menu ![]() , then select Security Center.
, then select Security Center.
2.Make sure Dr.Web operates in administrator mode (the lock at the bottom of the program window is open ![]() ). Otherwise, click the lock
). Otherwise, click the lock ![]() .
.
3.At the top of the program window, click .
4.A product main settings window opens. Select Network at the left of the window.

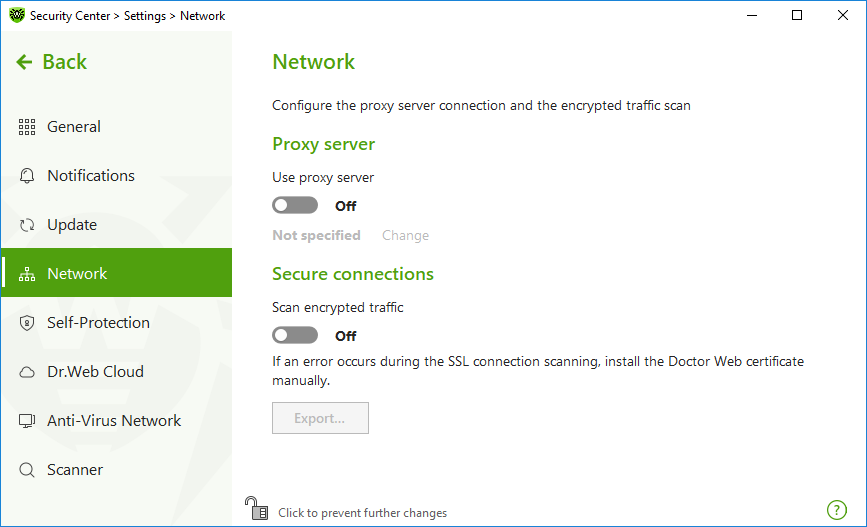
Figure 33. Connecting to proxy server and checking the encrypted traffic
By default, all components use direct connection mode. If necessary, you can enable use of a proxy server and specify its connection settings. For this:
1.Enable Use proxy server option by using the switcher ![]() .
.
2.Click Edit to specify the following proxy server parameters:
Option |
Description |
|---|---|
Type |
Select the protocol to connect to the proxy server. |
Address |
Specify the address of the proxy server. |
Port |
Specify the port of the proxy server. |
Login |
Specify the username to use when connecting to the proxy server. |
Password |
Specify the password to use when connecting to the proxy server under the provided username. |
Authorization type |
Select an authorization type required to connect to the proxy server (for HTTP only). |
If you want Dr.Web to check data transmitted over SSL, TLS or STARTTLS protocols, enable the Scan encrypted traffic option. SpIDer Mail will check messages sent over POP3S, SMTPS, or IMAPS, and SpIDer Gate—messages sent over HTTPS.
|
Scan of encrypted email traffic is available only for mail servers that support the ciphers available in CryptoAPI. |
If your client application that uses secure connections does not refer to the default Windows system certificate storage, then you need to export the Doctor Web security certificate to every application manually.
|
The security certificate is valid for one year. You should import the certificate again every year if necessary. |
![]() What is a security certificate
What is a security certificate
A security certificate is an electronic document which confirms that a certified program has been tested in one of the certification centers. Also, security certificates are named SSL-certificates, because SSL protocol (Secure Socket Layer) is used. It provides encrypted communication between hosts in internet, for example, between a user and a web server. Installing (importing) into a program which works with the internet security certificate of a web site ensures that communication will be carried out in a secure mode with authentication check. In this case, criminals will face a number of difficulties with data interception. |
The following applications may require the Dr.Web certificate import:
•Opera browser
•Firefox browser
•Mozilla Thunderbird mail client
•The Bat! mail client and others
To export and import Dr.Web certificate
1.Enable the Scan encrypted traffic option by using the switcher ![]() if the Export button is not enabled. This will generate the Dr.Web security certificate.
if the Export button is not enabled. This will generate the Dr.Web security certificate.
2.Click Export.
3.Select a folder you want the certificate to be saved in. Click OK.
4.Import the certificate to a target application. Find more details about the certificate import into target application’s user documentation.
|
If Scan encrypted traffic is activated, for correct operation of cloud storages clients (such as Google Drive, Dropbox, Yandex.Disk etc.), exclude these applications from scanning by SpIDer Gate. |