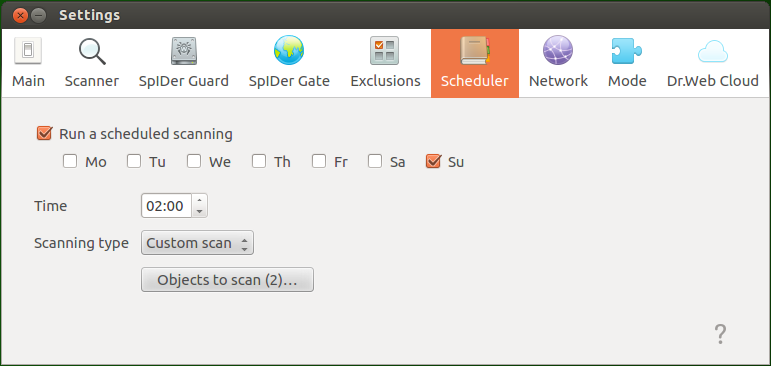
On the Scheduler tab, you can enable starting scheduled scan tasks automatically as well as adjust the schedule and select a scan type.

Figure 47. Scheduler settings
To enable automatic scheduled scans, select the check box Run a scheduled scanning. In this case, Dr.Web Security Space generates a schedule to periodically start a scan of a certain type.
Scheduled scanning is started at the specified intervals by the notification agent or directly by the graphical management interface if it is started at the same time with scanning. Scheduled scanning is not started if Dr.Web Security Space is controlled by a centralized protection server or an active license is unavailable.
Scheduled scanning as well as scanning on demand is configured on the Scanner tab. |
If scheduled scanning is enabled, you can configure the following parameters:
•select the days of the week to start scanning (to do this, select the corresponding check boxes);
•set the time (hours and minutes) to start scanning;
•select a scan type (Express scan, Full scan or Custom scan).
If you have selected Custom scan, you should also specify a list of objects to be scanned. To do that, click Objects to scan (a number of objects to be scanned is indicated in brackets). After that, a custom scan window appears which is similar to a window of custom scan on demand. You can add objects to the list either by clicking + or by dragging and dropping them from the file manager window.
To disable automatic scheduled scanning, clear the check box Run a scheduled scanning. The respective task for the notification agent will be automatically removed.