The Behavior Analysis component allows you to configure Dr.Web reaction on third-party application actions that are not trusted and may result in infecting your computer, e.g., attempts to modify the HOSTS file or to change the critically important system registry keys. When the Behavior Analysis component is enabled, Dr.Web blocks automatic changing of system objects, if such modification explicitly signifies a malicious attempt to harm the operating system. Behavior analysis protects the system against previously unknown malicious programs that can avoid detection by traditional signature-based and heuristic analyses.
To access the Behavior Analysis window
1.Open Dr.Web menu ![]() , then select Security Center.
, then select Security Center.
2.In the open window, click Preventive Protection tile.
3.Make sure Dr.Web operates in administrator mode (the lock at the bottom of the program window is open ![]() ). Otherwise, click the lock
). Otherwise, click the lock ![]() .
.
4.Click the Behavior Analysis tile.
The component settings can be adjusted if the administrator of the central protection server, to which Dr.Web is connected, enables this option. |
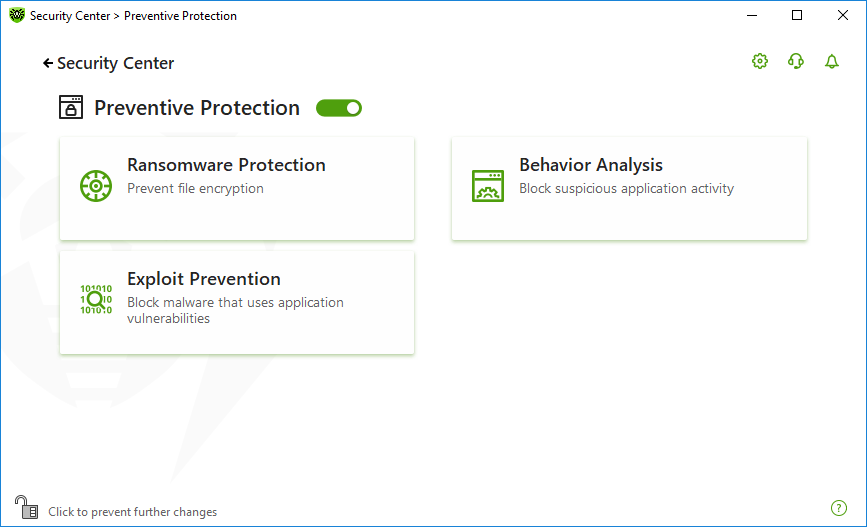
Figure 61. Access to the Behavior Analysis component
In this section:
•Creating and editing necessary application rules
Behavior Analysis parameters
The default settings are optimal for most cases. Do not change them unnecessarily.
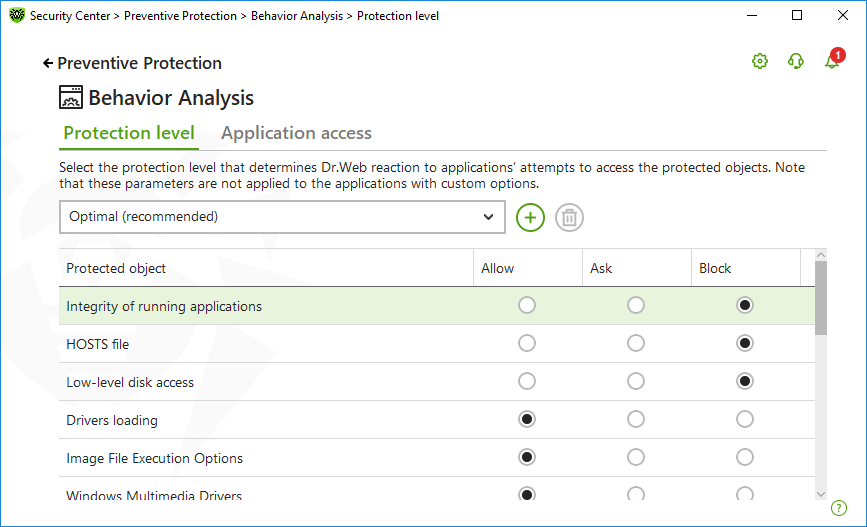
Figure 62. Behavior Analysis parameters
You can configure a separate protection level for particular objects and processes or set a general level which settings will be applied to all other processes. To set a general protection level, select it from the drop-down list on the Protection level tab.
Protection level |
Description |
||
Optimal (recommended) |
Dr.Web disables automatic changes of system objects, whose modification explicitly signifies a malicious attempt to harm the operating system. It also blocks low-level application access to disk and protects the HOSTS file from modification, if it explicitly signifies a malicious attempt to harm the operating system.
|
||
Medium |
If there is a high risk of your computer getting infected, you can increase protection by selecting this mode. In this mode, access to the critical objects, which can be potentially used by malicious software, is blocked.
|
||
Paranoid |
When required to have total control of access to critical Windows objects, you can select this mode. In this mode, Dr.Web also provides you with interactive control over loading of drivers and automatic running of programs. |
||
User-defined |
With this mode, you can set a custom protection level for various objects. |
User mode
All changes are saved in the User mode. In this window, you can also create a new protection level for saving necessary settings. The protected objects will be available for reading at all component settings.
You can choose one of the Dr.Web reactions to application attempts to modify the protected objects:
•Allow—the access to a protected object will be allowed for all the applications.
•Ask—if an application attempts to modify a protected object the notification will be displayed:
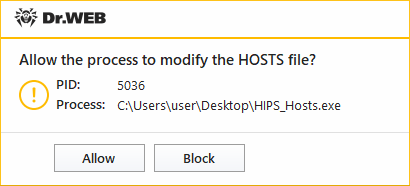
Figure 63. Notification example with an access to a protected object request
•Block—if an application attempts to modify a protected object the access will be blocked. Herewith, the notification will be displayed:

Figure 64. Notification example with a blocked access to a protected object
To create a new protection level
1.Look through default settings and, if necessary, edit them.
2.Click the button.
3.In the open window, enter a name for the new profile.
4.Click OK.
To delete a protection level
1.In the drop-down menu, select a protection level created earlier that you want to delete.
2.Click the button. Predefined profiles cannot be deleted.
3.To confirm the deletion, click OK.
Receiving notifications
If necessary, you can configure desktop notifications on Behavior Analysis actions.
See also
To add custom access parameters for certain applications, go to the Application access tab. On this tab, you can add a new application rule, edit or delete an existing one.
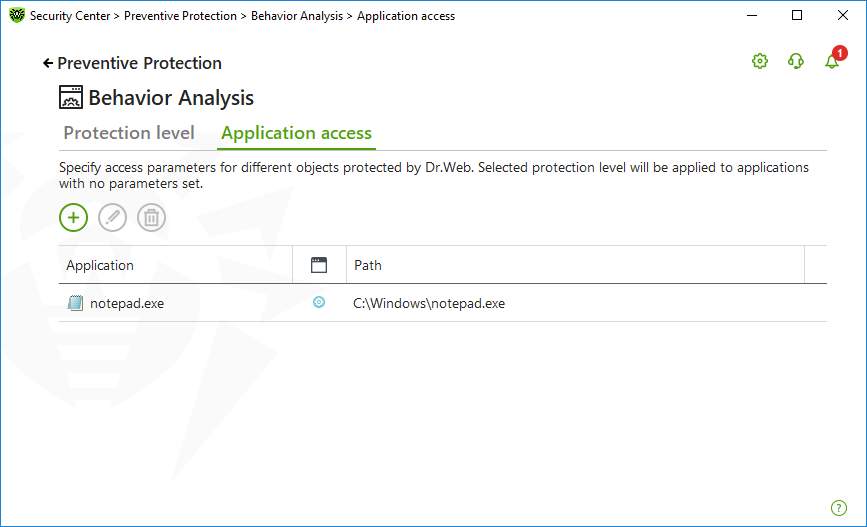
Figure 65. Application access parameters
The following management elements are available to work with objects in the table:
•The button—adding a rule set for the application.
•The button—editing existing rule sets.
•The button—deleting a rule set.
In the (Rule type) column you can see three rule types:
•—the Allow all rule is set for all protected objects.
•—different rules are set for protected objects.
•—the Block all is set for all protected objects.
To add an application rule
1.Click .
2.In the open window, click Browse and specify the path to the application executable file.
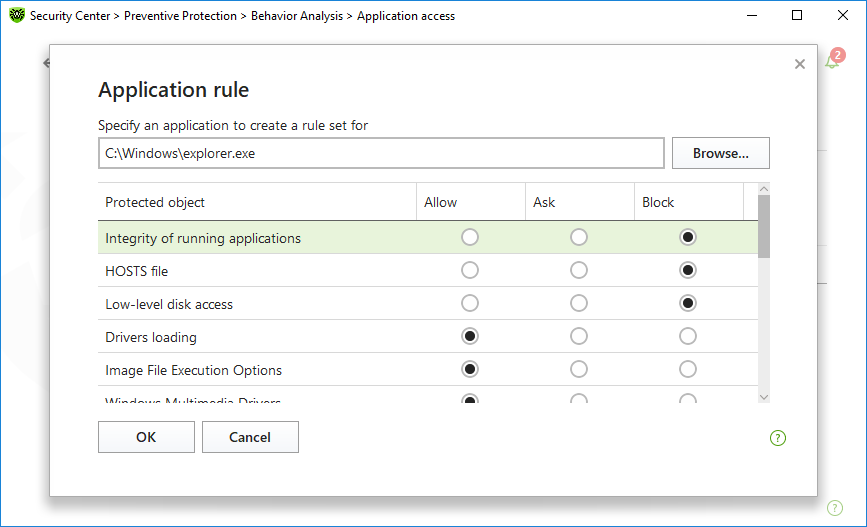
Figure 66. Adding a rule set for an application
3.Look through default settings and, if necessary, edit them.
4.Click OK.
Protected object |
Description |
|---|---|
Integrity of running applications |
This option allows detection of processes that inject their code into running applications. It indicates that the process may compromise computer security. |
HOSTS file |
The operating system uses the HOSTS file when connecting to the internet. Changes to this file may indicate virus infection. |
Low level disk access |
Block applications from writing on disks by sectors while avoiding the file system. |
Drivers loading |
Block applications from loading new or unknown drivers. |
Critical Windows objects |
Other options allow protection of the following registry branches from modification (in the system profile as well as in all the users' profiles). Image File Execution Options •Software\Microsoft\Windows NT\CurrentVersion\Image File Execution Options Windows Multimedia Drivers: •Software\Microsoft\Windows NT\CurrentVersion\Drivers32 •Software\Microsoft\Windows NT\CurrentVersion\Userinstallable.drivers Winlogon registry keys: •Software\Microsoft\Windows NT\CurrentVersion\Winlogon, Userinit, Shell, UIHost, System, Taskman, GinaDLL Winlogon notifiers: •Software\Microsoft\Windows NT\CurrentVersion\Winlogon\Notify Windows registry startup keys: •Software\Microsoft\Windows NT\CurrentVersion\Windows, AppInit_DLLs, LoadAppInit_DLLs, Load, Run, IconServiceLib Executable file associations: •Software\Classes\.exe, .pif, .com, .bat, .cmd, .scr, .lnk (keys) •Software\Classes\exefile, piffile, comfile, batfile, cmdfile, scrfile, lnkfile (keys) Software Restriction Policies (SRP): •Software\Policies\Microsoft\Windows\Safer Browser Helper Objects for Internet Explorer (BHO): •Software\Microsoft\Windows\CurrentVersion\Explorer\Browser Helper Objects Autorun of programs: •Software\Microsoft\Windows\CurrentVersion\Run •Software\Microsoft\Windows\CurrentVersion\RunOnce •Software\Microsoft\Windows\CurrentVersion\RunOnceEx •Software\Microsoft\Windows\CurrentVersion\RunOnce\Setup •Software\Microsoft\Windows\CurrentVersion\RunOnceEx\Setup •Software\Microsoft\Windows\CurrentVersion\RunServices •Software\Microsoft\Windows\CurrentVersion\RunServicesOnce Autorun of policies: •Software\Microsoft\Windows\CurrentVersion\Policies\Explorer\Run Safe mode configuration: •SYSTEM\ControlSetXXX\Control\SafeBoot\Minimal •SYSTEM\ControlSetXXX\Control\SafeBoot\Network Session Manager Parameters: •System\ControlSetXXX\Control\Session Manager\SubSystems, Windows System services: •System\CurrentControlXXX\Services |
If any problems occur during installation of important Microsoft updates or installation and operation of programs (including defragmentation programs), temporarily disable Behavior Analysis. |