In this section
•Opening a Panel to Scan Local Files and Adjusting Scanning Parameters
•Starting the Scanning of Local Files
The web interface allows you to quickly scan files stored on your local computer used to access the web interface. The scanning engine included in Dr.Web Server Security Suite is used for scanning. The files selected for scanning are uploaded via HTTP to a server, but after the scanning, even if threats have been found, the files are not stored on the server and are not quarantined. The user who sent the files for scanning is only informed about its result.
Opening a Panel to Scan Local Files and Adjusting Scanning Parameters
You can select and upload the files for scanning via a panel for scanning local files, which is displayed when you select the Scan File item on the main menu of the web interface. The activated panel is displayed in the bottom right corner of the web interface. The figure below shows what the panel for scanning local files looks like.

Figure 7. Panel for scanning local files
To close this panel, click ![]() in the top right corner of the panel. Click
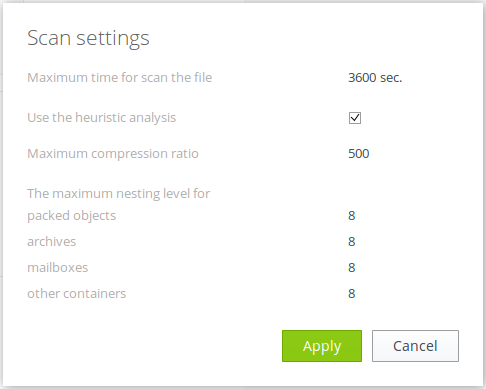
in the top right corner of the panel. Click ![]() to display the settings for the scanning of local files, where you can set the maximum time to scan a file (which does not include the time for uploading the file to the server from the local computer), enable or disable the heuristic analysis, and also set the maximum compression ratio for compressed objects and the maximum nesting level for objects packed into containers (such as archives).
to display the settings for the scanning of local files, where you can set the maximum time to scan a file (which does not include the time for uploading the file to the server from the local computer), enable or disable the heuristic analysis, and also set the maximum compression ratio for compressed objects and the maximum nesting level for objects packed into containers (such as archives).

Figure 8. Adjusting the parameters for the scanning of local files
To apply the adjusted settings and to return to the file selection mode, click Apply. To go back to file selection without applying changes, click Cancel.
Starting the Scanning of Local Files
To start file scanning, click the target area Drag files for scan here or click to select; at that, a standard file chooser of your file manager opens. You can select multiple files at once for scanning.
You cannot select directories for scanning. |
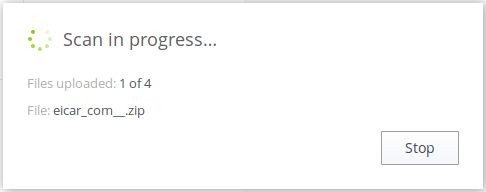
In addition, you can drag selected files with your mouse directly to the target area from the file manager window. Once the files to be scanned have been specified, they are uploaded to the server running Dr.Web Server Security Suite and scanned after uploading. During the uploading and scanning of the files, the file scanning panel displays the overall scanning progress.

Figure 9. Scanning local files
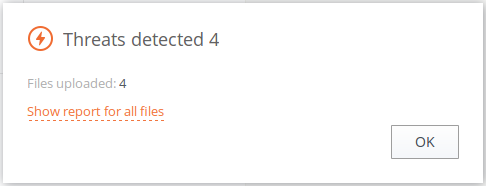
If necessary, you can abort uploading and scanning by clicking Stop. Once the scanning is complete, a report about the scanning of the uploaded files is displayed on the panel.

Figure 10. Result of the scanning of local files
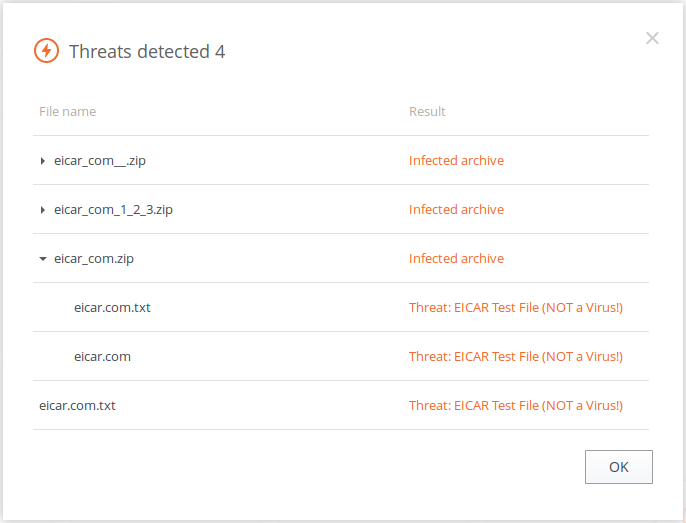
If multiple files have been uploaded, an extended report about the scanning will be available. To view the extended report, click View report for all files.

Figure 11. Extended report on scanned local files
To close the report and return to selecting new files for scanning, click OK.
You can start scanning local files with the current settings even if the file scanning panel is closed. To start uploading and scanning local files, just drag them from the file manager window to the web interface page opened in your browser. |