Dr.Web CMS Web Console (see Figure 18) is supported by the managing service Dr.Web CMS Web Console, which is controlled by another managing service—Dr.Web CMS.
Dr.Web CMS Web Console connects to the managing service via administration protocol.
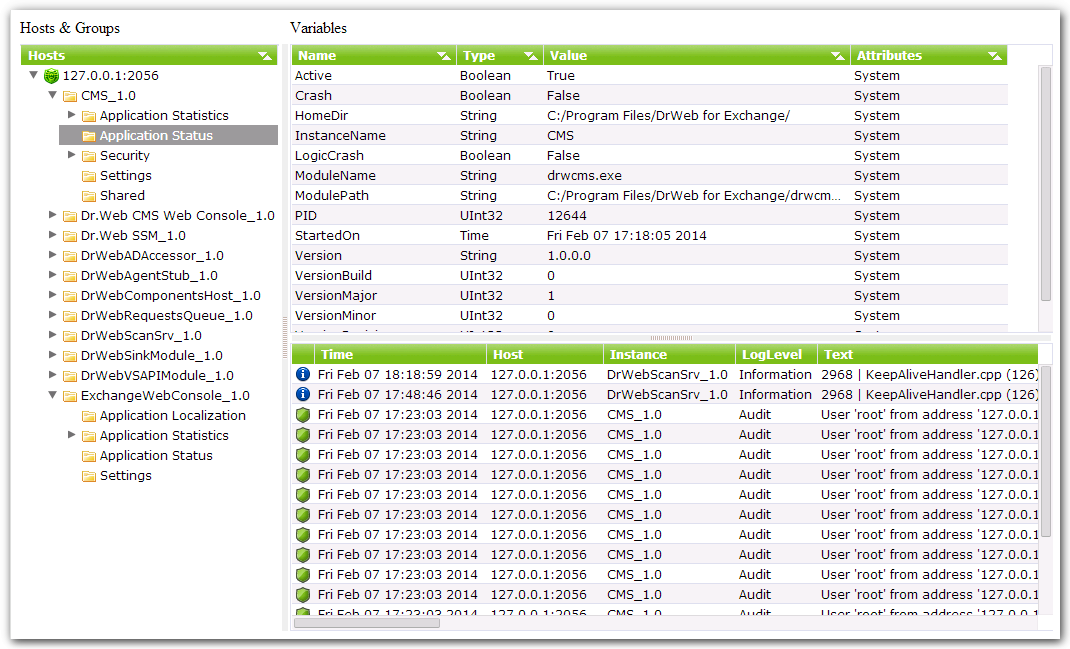
Figure 18. Dr.Web CMS Web Console
Before using Dr.Web CMS Web Console, you should install the ca_root.crt root certificate into the Trusted Root Certification Authorities store.
To import the root certificate into the Trusted Root Certification Authorities store
1.In the Dr.Web plug-in folder, find the ca_root.crt file and open it.
2.Click Install Certificate.
3.In the opened Certificate Import Wizard window, select Local Machine. Click Next.
4.Select Place all certificates in the following store option and click Browse.
5.In the opened window, select Trusted Root Certification Authorities. Click OK.
6.Click Next.
7.In the Certificate Import Wizard window, check the specified settings and click Finish.
Launching Dr.Web CMS Web Console
To launch Dr.Web CMS Web Console, open the following page in a browser:
https://<Exchange Server address>:2080/admin,
where <Exchange Server address> is the IP address of the Exchange server.
|
To access to the Dr.Web CMS Web Console page, you need to enter the administrator login and password. Administrator accounts can be added, edited or deleted by means of Dr.Web CMS Web Console. On the first launch of Dr.Web CMS Web Console use the login root and the password drweb of the default administrator account. |
Interface
Dr.Web CMS Web Console consists of three parts:
1.Hosts and groups tree
Displays all connected hosts. Click a group in the variables window to open the list of variables. Right-click a group to open a context menu, where you can select one of the following options:
•Create group
•Rename group
•Delete group
•Create variable
Right-click a host to open a context menu, where the following options are available:
•Add host. Add a connection to a new host to the tree.
•Remove host. Remove a connection to the host from the tree.
•Create group. Create a new group.
•Create variable. Create a new variable.
•View traces. Display tracing messages in real-time mode.
•Debug traces. Enable debug tracing.
•Load traces. Download tracing messages for the past periods.
•Edit trace filter. Change tracing messages filtering parameters.
2.Variables list
The variables window contains the list of variables for the selected group with their attributes and values. If allowed by the attributes, you can click any field to edit the value. Right-click a variable to open a context menu, where you can select one of the following options:
•Create variable (opens a window to create new variable)
•Delete variable (if allowed by the attributes)
•Reset statistics variable (if this variable has the Statistics attribute)
Tracing messages containing information on the events registered by Dr.Web CMS Web Console are displayed in this window.
To display the tracing messages in real-time mode, select the View traces check box in the context menu, which opens on right-clicking the host address.
Every message contains the following information:
•Event time
•Host name
•Application name
•Logging level
•Message text
To filter the messages displayed in the tracing window, select the Edit trace filter item in the context menu, which opens on right-clicking the host address. In the opened window, specify the following filtering parameters:
•Log level. Events logging level.
•Instances. Event sources.
•Contents. Text included in the message (in the Text field).
•NonContents. Text not included in the message (in the Text field).
To delete the message, select the Clear item in the the context menu, which opens on right-clicking the host address.