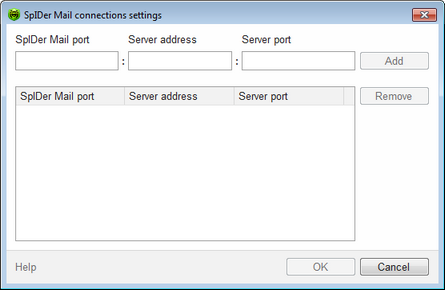
Interception of connections is required when SpIDer Mail serves as a proxy between mail programs and servers, for example, when it is necessary to intercept connections to mail servers residing on your computer (i.e., using the localhost address).

For details on a certain option, click the corresponding item in the picture.
To configure mail interception
1.List all mail servers whose connections you want to intercept, and then number the servers successively in the ascending order. It is recommended to start numbering from 7000.The assigned numbers are called SpIDer Mail ports.
|
SpIDer Mail supports POP3, SMTP, IMAP4, and NNTP mail servers. |
2.In the SpIDer Mail settings window, select the Scanning page and click Change.
3.In the settings window, enter the following information:
•SpIDer Mail port – the SpIDer Mail port that you assigned for the mail server.
•Server address –the domain name or IP address of the server.
•Server port – the port number that the mail server uses.
4.Click Add.
5.To add other servers, repeat steps 3 to 4. To stop intercepting connections to a mail server, select the corresponding item and click Remove.
6.After editing, click OK to save the changes or Cancel to cancel them.
If you use manual settings to interception connections to your mail server with SpIDer Mail, you must configure your mail client accordingly:
•set the addresses of the incoming and outgoing mail servers to localhost
•set their ports to the SpIDer Mail port number that you assigned to the mail server.
To assign those settings, you usually need to specify the localhost:<SpIDer_Mail_port> connection string, where <SpIDer_Mail_port> is the number you selected for the mail server. ![]() Example
Example
If you assigned a 7000 SpIDer Mail port to a mail server that uses the 110 port and the pop.mail.com address, then set mail client to connect to localhost via the 7000 port. |