|
To install Dr.Web, a user must have administrative privileges. |
There are two installation modes of Dr.Web anti-virus software:
•The background mode
•The usual mode
Installation with command-line parameters
To install Dr.Web with command-line parameters, enter in the command line the executable file name with necessary parameters (they affect installation in background mode, installation language, reboot after installation, and Dr.Web Firewall installation).
Parameter |
Description |
|---|---|
installFirewall |
Install Dr.Web Firewall. |
lang |
Language used for the installation. The value of this parameter is language in ISO 639-1 format. |
reboot |
Restart the computer automatically after installation is complete. |
silent |
Installation in background mode. |
For example, to start background installation of Dr.Web with reboot after the process completes, execute the following command:
drweb-900-win-space.exe /silent yes /reboot yes
Usual Installation
To start usual installation, do one of the following:
•run the file, if the installation kit is supplied as a single executable file;
•insert the company disk into the CD/DVD drive, if the installation kit is supplied on the disk. If autorun is enabled, the installation will start automatically. If autorun is disabled, run the autorun.exe file of the installation kit manually. The window opens and displays the autorun menu. Click Install.
Follow the instructions of the Installation Wizard. At any installation step, before the wizard starts copying files to your computer, you can do the following:
•return to the previous step by clicking Back;
•go to the next step by clicking Next;
•abort installation by clicking Exit.
|
The given images match Dr.Web Security Space interface. The steps of installation are similar to those for Dr.Web Anti-virus for Windows. |
Installing Dr.Web
1.If other anti-virus software is installed on your computer, the Installation Wizard informs you on incompatibility between Dr.Web and another anti-virus product and offers to remove it.
|
Before the installation starts, the Wizard checks if the installation file is the latest one. If newer installation file exists, you will be offered to download it before the installation. |
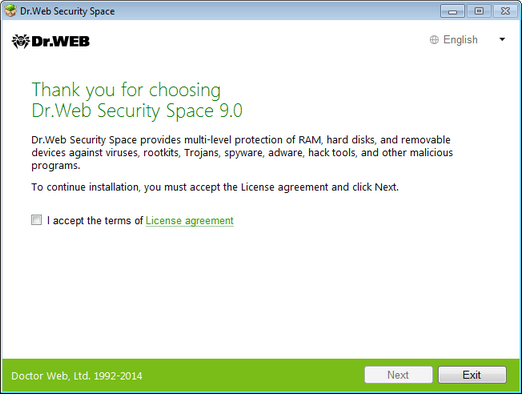
2.Read the license agreement. To continue installation, you must accept its terms and click Next.
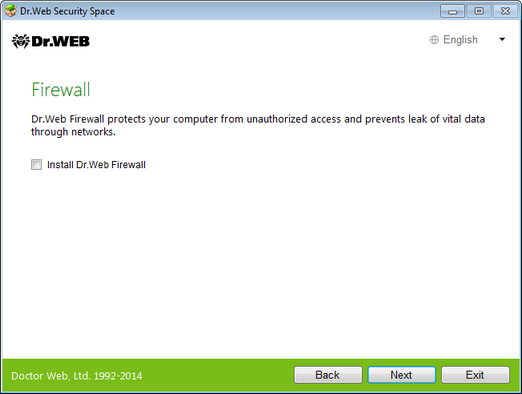
3.In the next window, you will be offered to install Dr.Web Firewall.
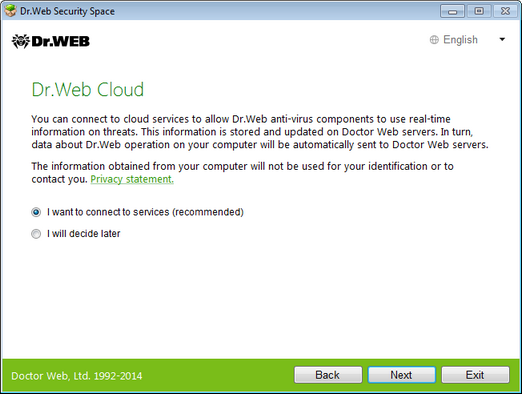
4.At this step, you are prompted to connect to Dr.Web cloud services that allow anti-virus components to use the newest information which is stored and updated on Doctor Web servers.
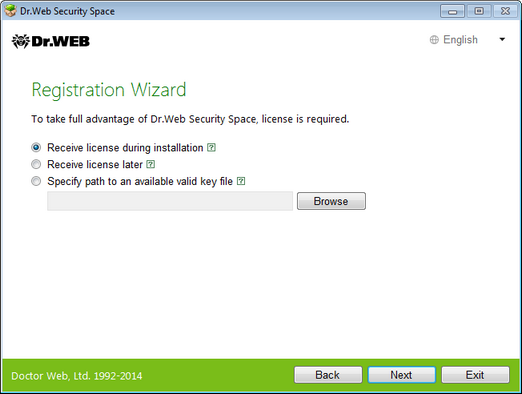
5.The Installation Wizard informs you that a license is required for Dr.Web operation. Do one of the following:
•If a key file is present on the hard drive or removable media, click Specify path to an available valid key file and select the file in the open window. To change the path, click Browse and select another key file.
•If you want to receive a key file during the installation, select Receive license during installation.
•To continue installation without a license, select Receive license later. Updates are not available until you specify or obtain a key file.
Click Next.
|
Use only a Dr.Web key file. Key files of this type have the .key extension. |
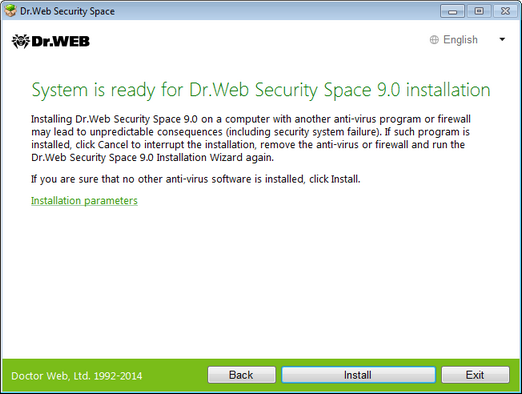
6.The window opens notifying you that the product is ready to be installed. To start installation with the default parameters, click Install.
To select components you want to install, specify the installation path, and set additional parameters, click Installation parameters. The option is meant for experienced users.
7.If you selected Install at the previous step, go to the description of step 10. Otherwise, the Installation parameters window displays. On the first tab, you can specify the components you want to install.

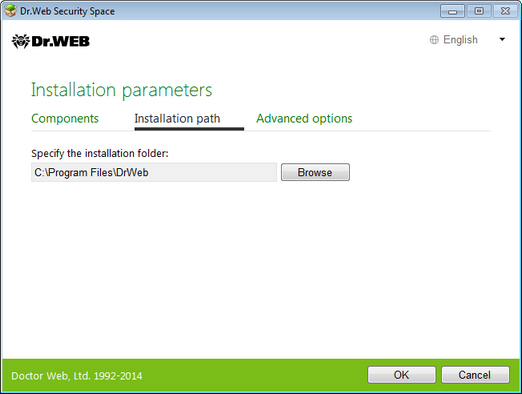
8.On this tab, you can change the installation path.
9.If you specified a valid key file or selected Receive license during installation at step 5, the last tab of the window allows you to select Update during installation check box to download updates to virus databases and other program components. The tab also prompts you to create shortcuts to Dr.Web.
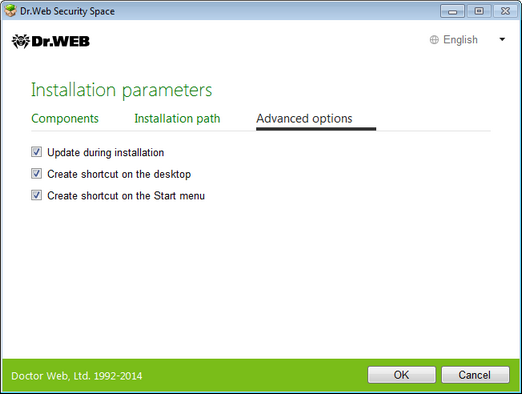
When you finish adjusting the installation parameters, click ОК.
10.If you selected Receive license during installation at step 5, the procedure of receiving the key file from the Internet via the Registration Wizard starts.
11.If you specified a key file or received it during the installation and selected Update during installation check box at step 9, the wizard updates virus databases and other Dr.Web components. Updating starts automatically and does not require any additional actions.
12.Restart your computer after the installation is complete.