The network administrator may enable server notifications on any station. This feature can be necessary for the administrator while working at one of the stations.
To open Server Notifications window
1.Open Dr.Web menu ![]() .
.
2.Select Server Notifications.
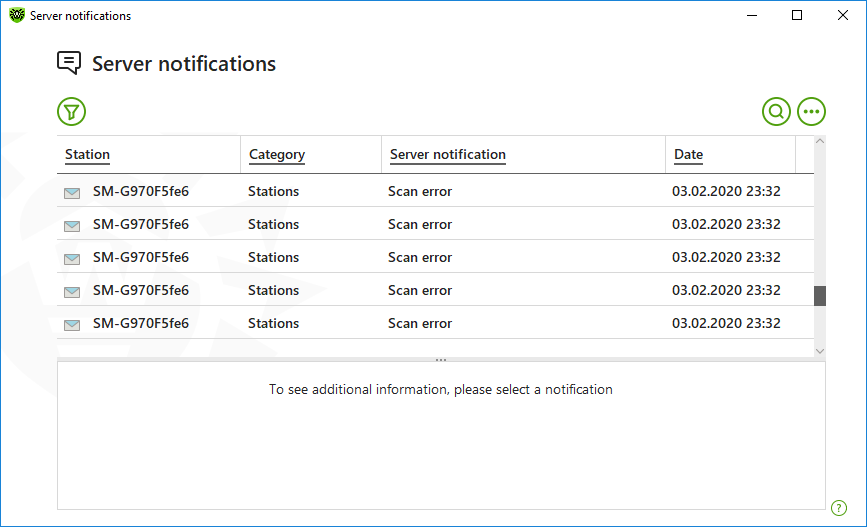
Figure 102. Server Notifications window
All the notifications received are shown in the upper side of the window. To see the information on the notification, click it.
Filters
To view a list of only those notifications that correspond to specific parameters, use filters. By clicking ![]() only default filter is available. Its settings are the same as set on the server. You can also create custom notification filters.
only default filter is available. Its settings are the same as set on the server. You can also create custom notification filters.
![]() The buttons to manage table elements
The buttons to manage table elements
•Click ▫To select the default filter. ▫To save the current custom filter. It is also possible to delete previously saved custom filter. ▫To delete all the current filters. •Click ▫Copy selected—allows you to copy the selected entry (entries) to the clipboard. ▫Export selected—allows you to export the selected entry (entries) to the specified folder in .csv format. ▫Export all—allows you to export all the entries of the table to the specified folder in .csv format. ▫Delete selected—allows you to delete the selected notification(s). ▫Mark as read—allows you to mark all the notifications as read. ▫Delete all—allows you to delete all the notifications from the table. •Click |
1.To filter by a specific parameter, click on the heading of the required column:
•Filter by station. You can sort entries in ascending or descending order only.
•Filter by category. You can check the categories the information on which will be included in the report, or arrange the entries by ascending or descending order. You can filter notifications by the following categories:
▫Administrators
▫Stations
▫Licenses
▫Newbies
▫Repository
▫Installations
▫Other
•Filter by server notification. You can sort entries in ascending or descending order only.
•Filter by date. You can select one of the predefined periods specified in the left part of the window, or specify your own. To set the required period, select the start date and the end date of the period in the calendar, or specify the dates in the Period field. Filtering by date is also available in ascending or descending order.
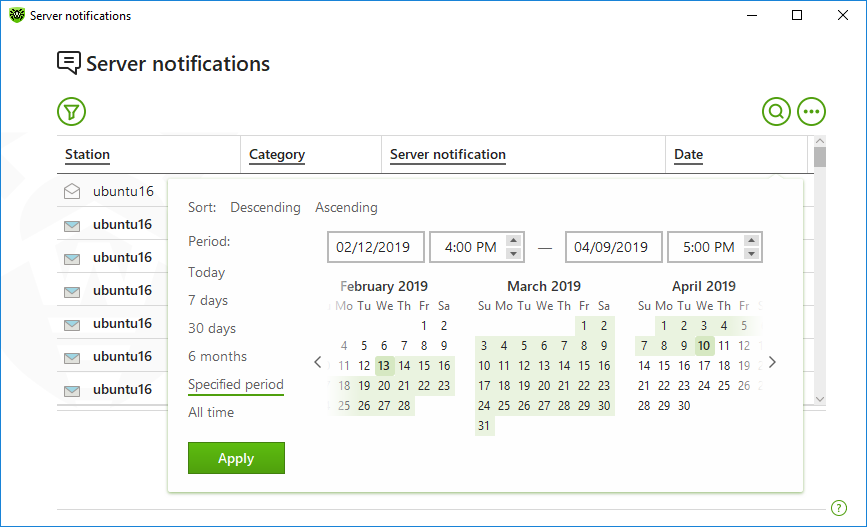
Figure 103. Data sorting
2.Once the filter parameters selected, click Apply. Selected items will be displayed above the table.
3.To save the filter, click ![]() and select Save filter.
and select Save filter.
4.In the open window, enter a name for the new filter. Click Save.