To open the Allowed devices window
1.Open Dr.Web menu ![]() , then select Security Center.
, then select Security Center.
2.In the open window, click Devices tile.
3.In the Allowed devices group, click Edit.
The Allowed devices window contains information on all the devices added to the list of allowed devices. This information is in the table:
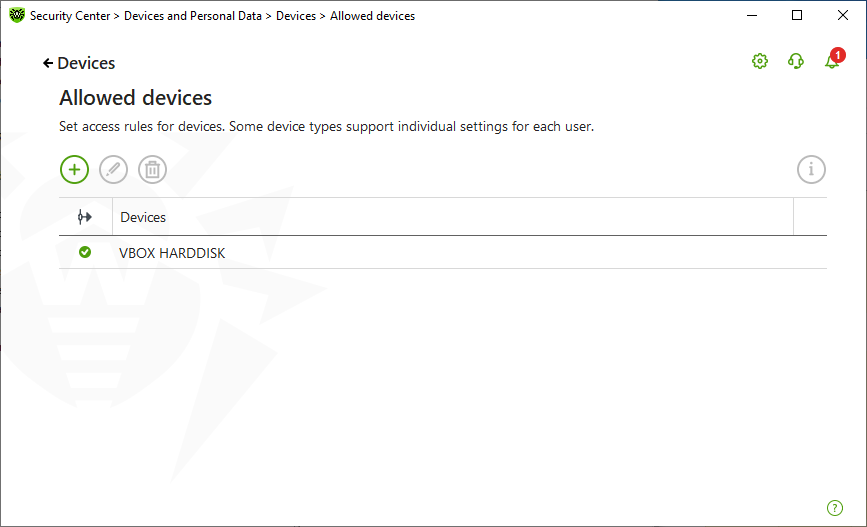
Figure 78. Allowed Devices
The following management elements are available to work with objects in the table:
•The ![]() button—adding a rule set for the device.
button—adding a rule set for the device.
•The ![]() button—editing a rule set for the device.
button—editing a rule set for the device.
•The ![]() button—deleting a rule set for the device.
button—deleting a rule set for the device.
You can view detailed information on a device added to the list of allowed devices. For that, select the necessary line and click ![]() .
.
In the ![]() (Rule type) column, you can see two rule types:
(Rule type) column, you can see two rule types:
•![]() —the Allow all rule is set.
—the Allow all rule is set.
•![]() —the Read-only rule is set.
—the Read-only rule is set.
To add a device to the list of allowed devices
1.Make sure that the device is connected to the computer.
2.Click ![]() . In the open window, click Browse and select the device. You can use a filter to view only connected or only disconnected devices in the table. Click OK.
. In the open window, click Browse and select the device. You can use a filter to view only connected or only disconnected devices in the table. Click OK.
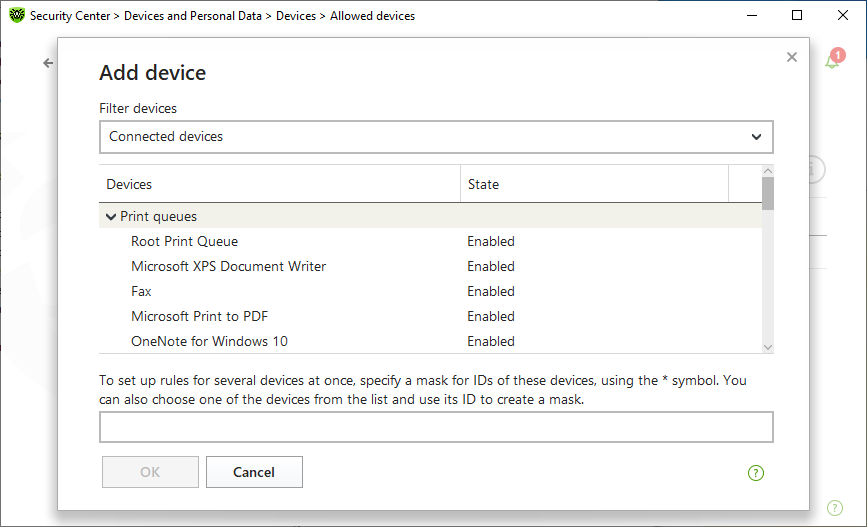
Figure 79. Adding a device to the list of allowed devices
3.You can configure access rules for devices with file systems. For that, from the Rule column, select one of the following modes: Allow all or Read-only. To add a new rule for a specific user, click ![]() . To delete a rule, click
. To delete a rule, click ![]() .
.
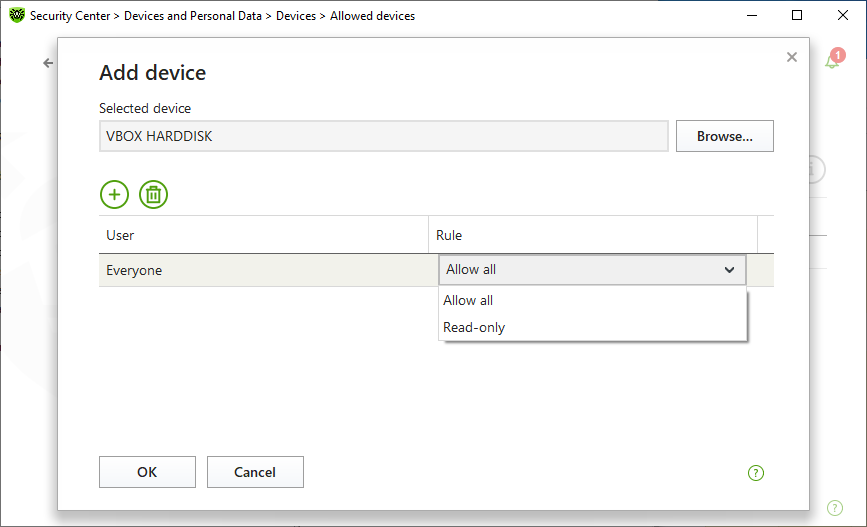
Figure 80. Selecting a rule for a certain user
4.To save the changes, click OK. To close the window without saving the changes, click Cancel. You will return to the list of allowed devices.